Get Started with Transfer2.5 and Predict2.5 on Brev
Authors: Carlos Casanova Organization: NVIDIA
Explore Brev
NVIDIA Brev is an excellent platform for experimenting with Cosmos. Follow these steps to get started:
- Create an account at https://brev.nvidia.com.
- Install the CLI as shown in the Brev CLI reference.
- Refer to the Brev Quickstart to get a feel for the platform. The Brev documentation is also linked from the Brev page.
While lower spec GPUs can work for some workflows, GPUs with 80GB of VRAM are recommended for Cosmos. Also note that the Transfer 2.5 AV Multiview model requires instances with 8 or more GPUs.
The cheat code: Launchables
Launchables are an easy way to bundle a hardware and software environment into an easily shareable link. Once you've dialed in your Cosmos setup, a Launchable is the most convenient way to save time and share your configuration with others.
In this section, we'll walk through building a Launchable for Transfer2.5. Setting up Predict2.5 is nearly identical to the below steps. Refer to the Predict2.5 setup guide and adjust the setup script accordingly. You can also set up both models at once.
Note: Cosmos and Brev are evolving. You may encounter minor UI and other differences in the steps below as Brev changes over time.
-
Find the Launchable section of the Brev website.

-
Click the Create Launchable button.

-
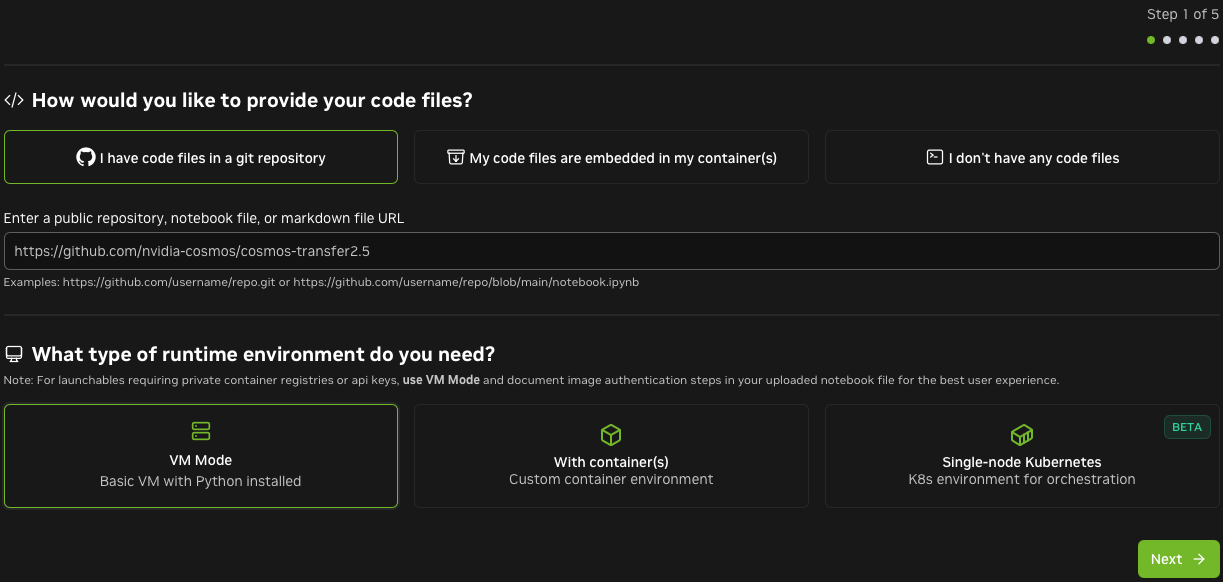
Enter the Cosmos Transfer URL: https://github.com/nvidia-cosmos/cosmos-transfer2.5
-
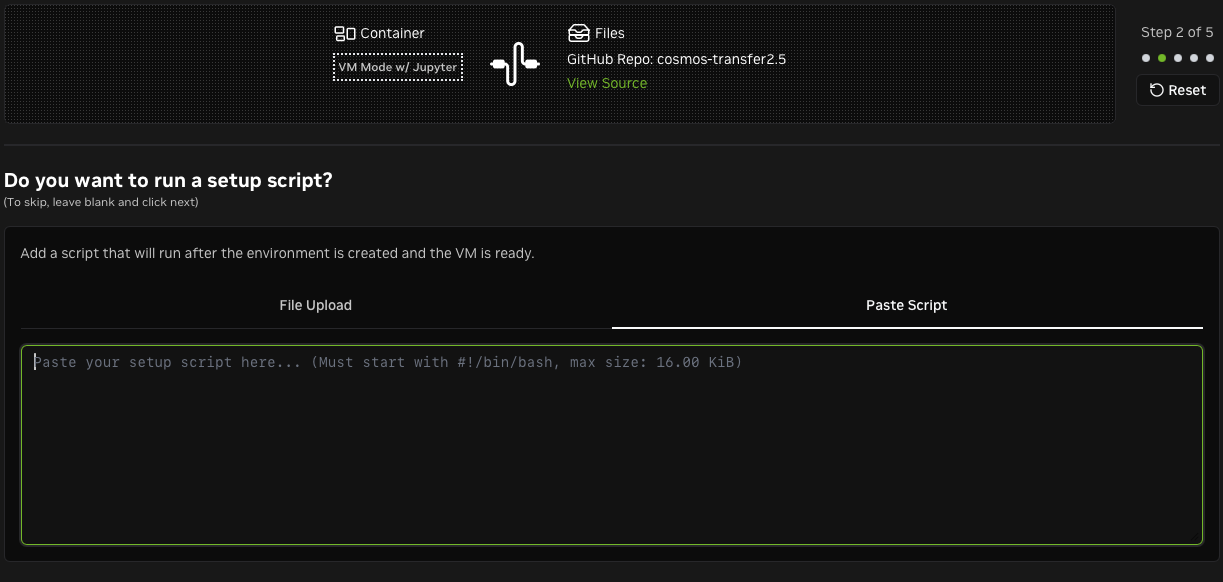
Add a setup script. Brev will run it after cloning the repo. This script should follow the setup instructions from the Cosmos Transfer2.5 repo. In this example, we use the sample script from later in this guide, which sets up a Python virtual environment with all dependencies.
-
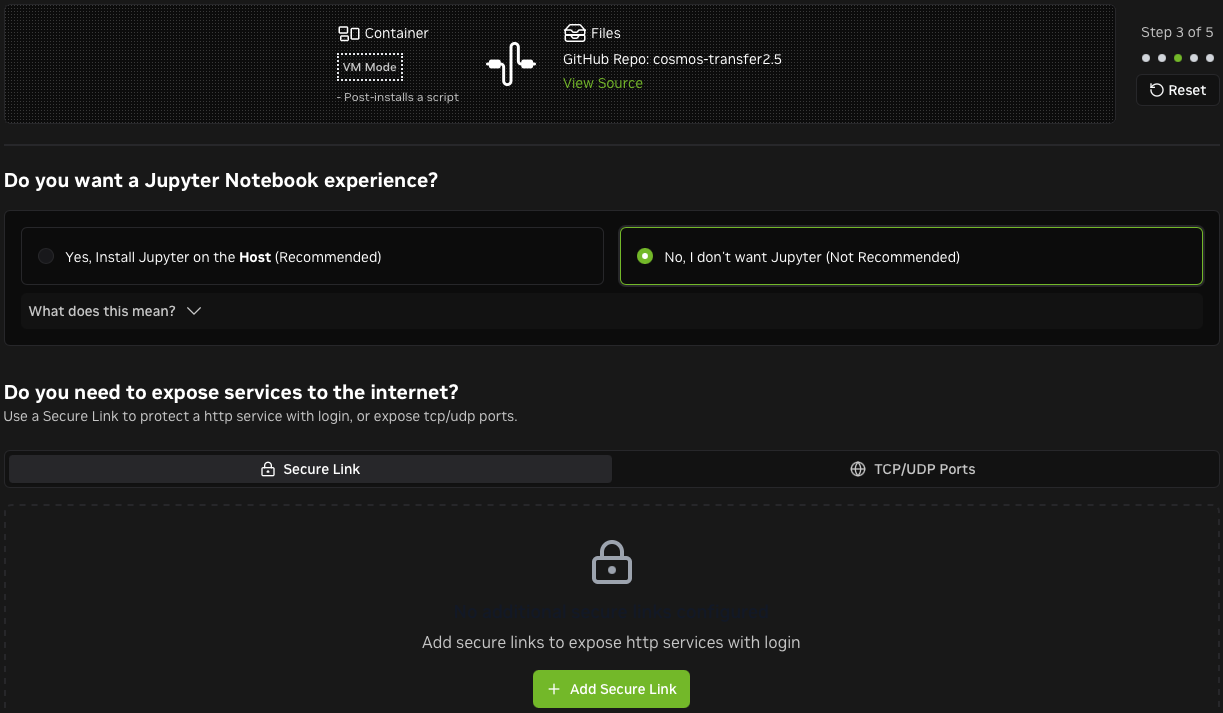
If you don't need Jupyter, remove it. You can open other ports on Brev if you plan to set up a custom server.
Setting up Predict2.5 is nearly identical to the above steps. Refer to the Predict2.5 setup guide and adjust the setup script accordingly. Want to setup both at once? Nothing's stopping you. The world is your oyster.
-
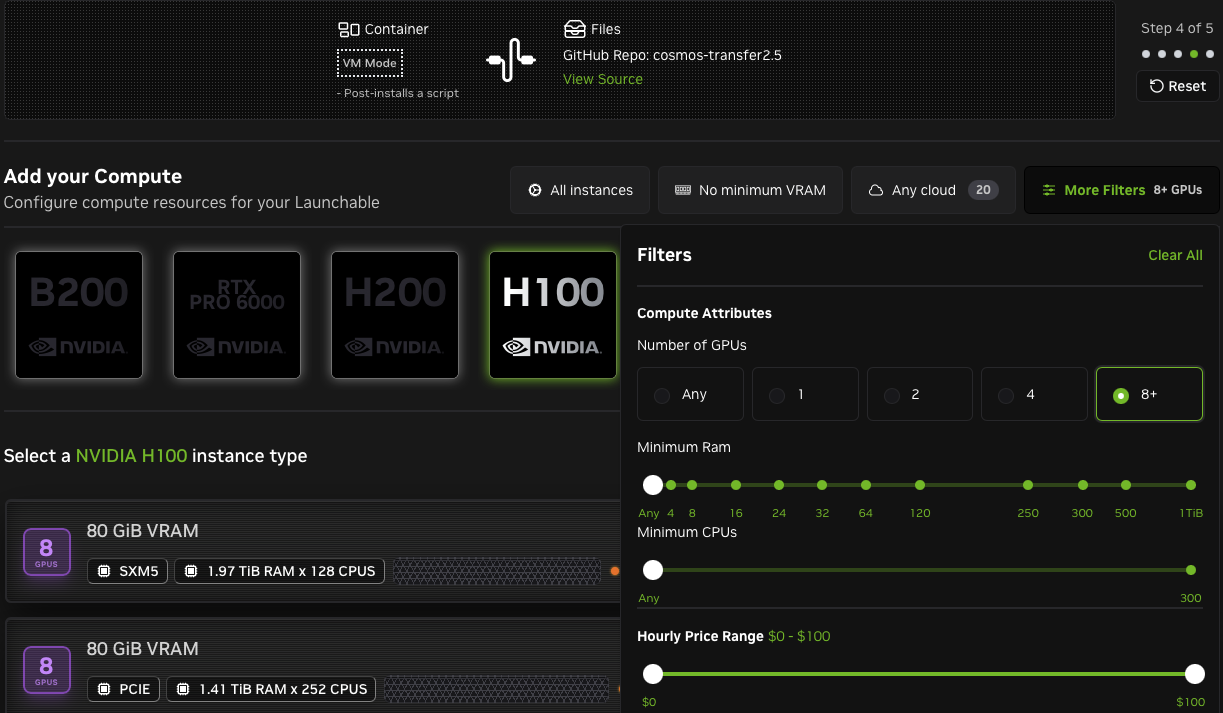
Choose the desired level of compute. The screenshot below shows filtering on 8+ GPUs to run the Transfer 2.5 AV Multiview model.
-
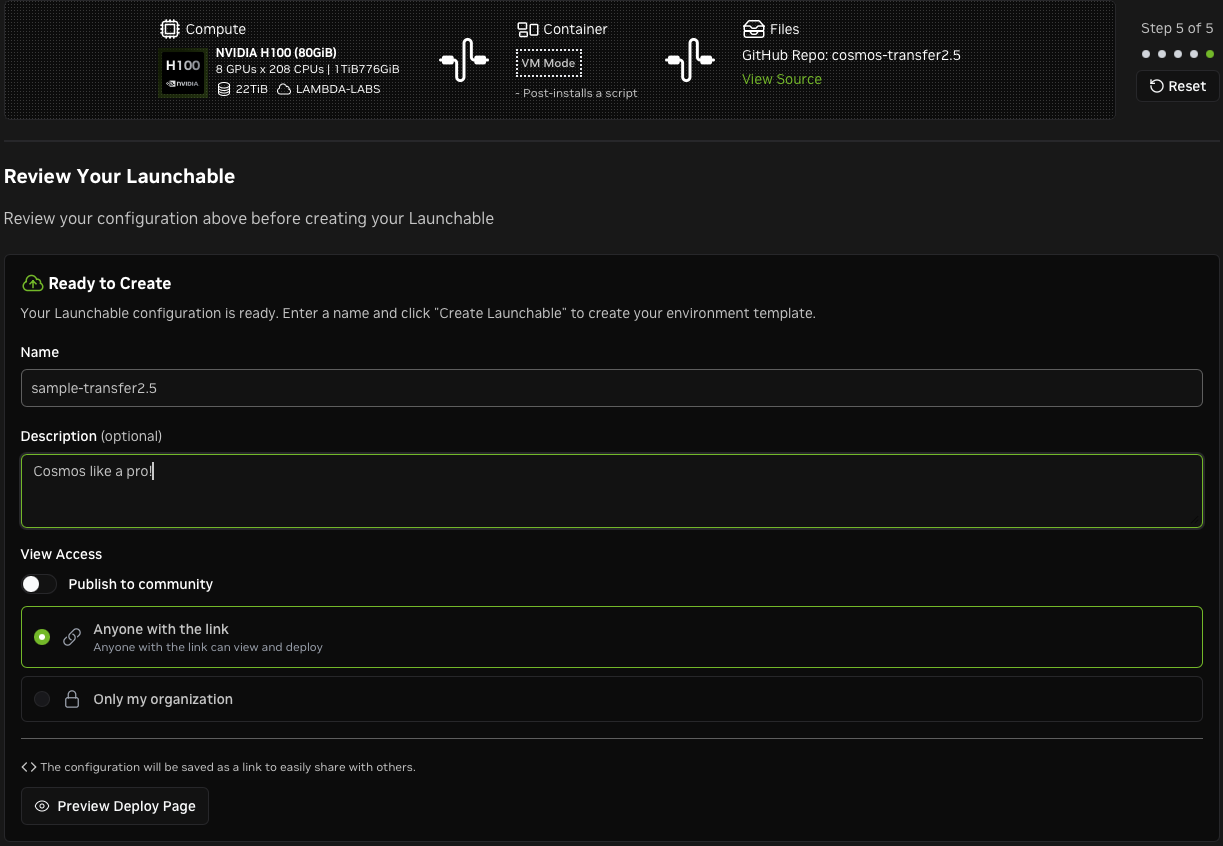
Name your Launchable and configure access.
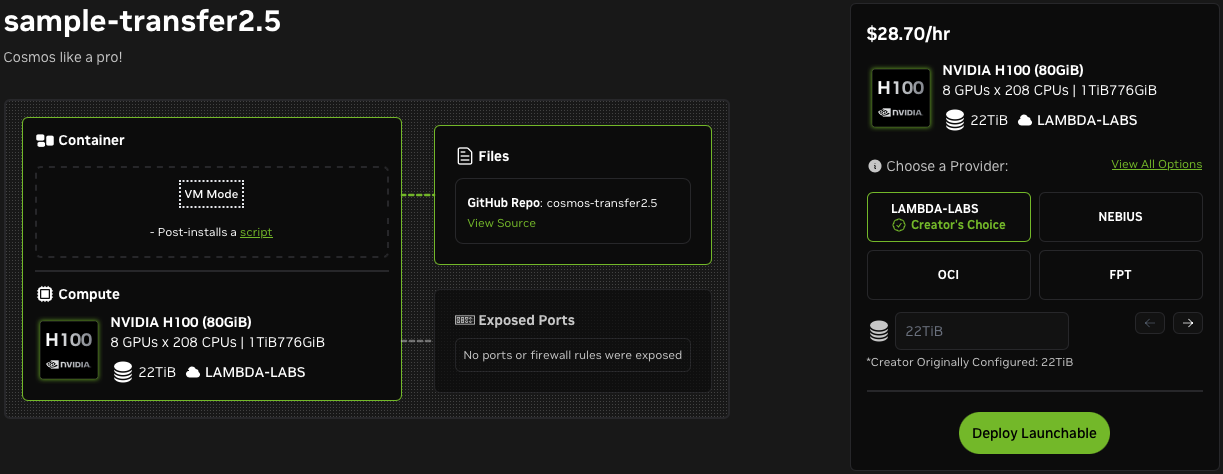
You're ready to deploy! Notice the View All Options link, which allows you to change the compute.
-
After deploying, visit the instance page to find helpful examples of how to connect to the instance. Note the Delete button, which allows you to delete your instance when you're done. This can also be done with the
brev deleteCLI command. Instances that support pause and resume can be stopped from this page.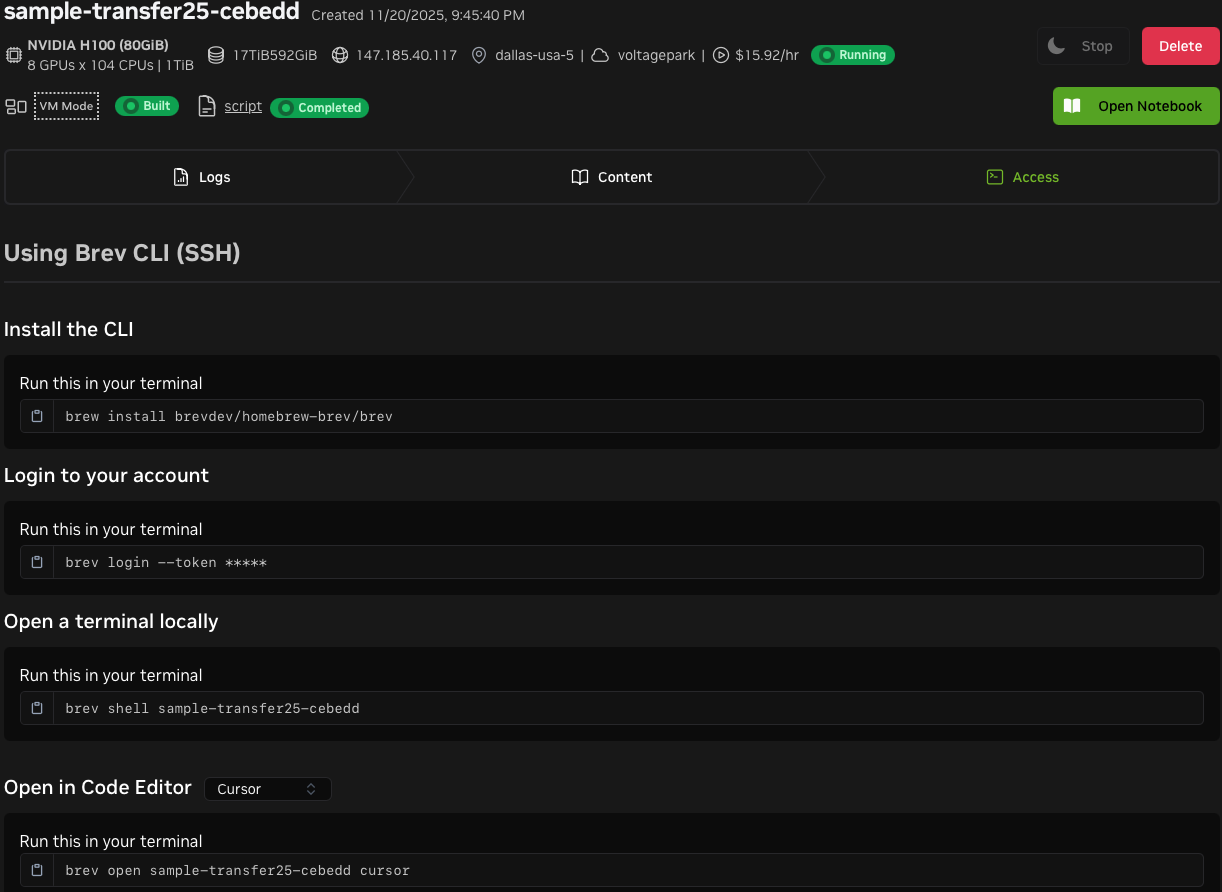
-
Connect to the instance. Activate the virtual environment and log in to HuggingFace to enable checkpoint downloads. Transfer2.5 won't work without the checkpoints.
Sample setup script
The sample setup script below sets up a Python virtual environment with all Transfer2.5 dependencies. It automatically detects the CUDA version, moves large data to the biggest available disk, and installs the CUDA toolkit if needed. After setup, run hf auth login to enable checkpoint downloads. Refer to the Transfer2.5 Downloading Checkpoints section for more info.
#!/bin/bash

# Detect the non-root user that Brev creates
if id "nvidia" &>/dev/null; then
  RUN_USER="nvidia"
elif id "shadeform" &>/dev/null; then
  RUN_USER="shadeform"
elif id "ubuntu" &>/dev/null; then
  RUN_USER="ubuntu"
else
  RUN_USER="root"
fi

sudo -u "$RUN_USER" bash -l <<'SETUP_EOF'
# Install required system packages
sudo apt-get update && sudo apt-get install -y git-lfs bc curl ffmpeg libx11-dev tree wget

REPO_NAME="cosmos-transfer2.5"
REPO_HOME="$HOME/$REPO_NAME"

# ---------------------------------------------------------------------------
# Disk space management: find the biggest writable disk.
# $HOME is not guaranteed to have enough space on all Brev instance types.
# ---------------------------------------------------------------------------
BIG_MOUNT=$(
  { find / -maxdepth 1 -mindepth 1 -type d -writable \
      -not -name tmp -not -name proc -not -name sys \
      -not -name dev -not -name run 2>/dev/null; echo "$HOME"; } | \
  while IFS= read -r d; do
    size=$(df -x tmpfs -x devtmpfs -x squashfs --output=size "$d" 2>/dev/null | tail -1 | tr -d ' ')
    [ -n "$size" ] && echo "$size $d"
  done | sort -rn | head -1 | awk '{print $2}'
)

if [ -z "$BIG_MOUNT" ]; then
  echo "Warning: no writable large mount found, falling back to HOME."
  BIG_MOUNT="$HOME"
fi

# Compare filesystems: only move if the repo is on a smaller disk
REPO_FS=$(df --output=target "$REPO_HOME" | tail -1 | tr -d ' ')
BIG_FS=$(df --output=target "$BIG_MOUNT" | tail -1 | tr -d ' ')

echo "Best writable dir:  $BIG_MOUNT (filesystem: $BIG_FS)"
echo "Repo filesystem:    $REPO_FS"

if [ "$REPO_FS" != "$BIG_FS" ]; then
  STORE="$BIG_MOUNT/$(id -un)"
  REPO_DST="$STORE/$REPO_NAME"
  echo "Moving repo to big disk: $REPO_DST"

  # Move entire repo to the big disk, symlink from HOME for convenience
  mkdir -p "$STORE"
  mv "$REPO_HOME" "$REPO_DST"
  ln -sfn "$REPO_DST" "$REPO_HOME"

  # Redirect HuggingFace cache (model weights) to the big disk
  HF_CACHE="$STORE/huggingface"
  mkdir -p "$HF_CACHE" "$HOME/.cache"
  rm -rf "$HOME/.cache/huggingface"
  ln -sfn "$HF_CACHE" "$HOME/.cache/huggingface"

  echo "Repo:              $REPO_DST (symlinked from ~/$REPO_NAME)"
  echo "HuggingFace cache: $HF_CACHE (symlinked from ~/.cache/huggingface)"
else
  echo "Repo is already on the largest disk. No relocation needed."
fi

# ---------------------------------------------------------------------------
# git-lfs: pull any LFS objects from the repo Brev already cloned for us
# ---------------------------------------------------------------------------
cd "$REPO_HOME"
git lfs install
git lfs pull

# ---------------------------------------------------------------------------
# Install uv (fast Python package/project manager)
# ---------------------------------------------------------------------------
curl -LsSf https://astral.sh/uv/install.sh | sh
source "$HOME/.local/bin/env"

# ---------------------------------------------------------------------------
# Install HuggingFace CLI (used to authenticate and download checkpoints)
# ---------------------------------------------------------------------------
uv tool install -U huggingface_hub

# ---------------------------------------------------------------------------
# Auto-detect CUDA version and select the matching extras
# ---------------------------------------------------------------------------
CUDA_VER=$(nvidia-smi | grep -oP 'CUDA Version: \K[0-9]+\.[0-9]+' | head -1)
CUDA_MAJOR=$(echo "$CUDA_VER" | cut -d. -f1)
if [ "${CUDA_MAJOR:-12}" -ge 13 ] 2>/dev/null; then
  CUDA_EXTRA="cu130"
else
  CUDA_EXTRA="cu128"
fi
echo "Using CUDA extra: $CUDA_EXTRA"

# ---------------------------------------------------------------------------
# Install the CUDA toolkit if the system doesn't already have one.
# Some providers ship only the GPU driver without the full toolkit, which
# causes runtime failures (libcudart.so, libnvrtc.so, etc. not found).
# ---------------------------------------------------------------------------
if ! ldconfig -p | grep -q libcudart.so; then
  CUDA_PKG_VER=$(echo "$CUDA_VER" | tr '.' '-')
  echo "System CUDA toolkit not found. Installing cuda-toolkit-${CUDA_PKG_VER}..."
  sudo apt-get install -y "cuda-toolkit-${CUDA_PKG_VER}"
else
  echo "System CUDA toolkit already installed."
fi

# ---------------------------------------------------------------------------
# Set OMP_NUM_THREADS: distribute CPU cores evenly across GPU worker processes.
# Without this, torchrun defaults to 1 thread per process, leaving cores idle.
# ---------------------------------------------------------------------------
NUM_GPUS=$(nvidia-smi --query-gpu=name --format=csv,noheader | wc -l)
NUM_CPUS=$(nproc)
OMP_NUM_THREADS=$(( NUM_CPUS / NUM_GPUS ))
echo "export NUM_GPUS=$NUM_GPUS" >> "$HOME/.bashrc"
echo "export OMP_NUM_THREADS=$OMP_NUM_THREADS" >> "$HOME/.bashrc"
echo "Set OMP_NUM_THREADS=$OMP_NUM_THREADS ($NUM_CPUS CPUs / $NUM_GPUS GPUs)"

# ---------------------------------------------------------------------------
# Create the Python virtual environment and install all dependencies.
# ---------------------------------------------------------------------------
uv python install
uv sync --extra="$CUDA_EXTRA"

echo ""
echo "================================================================"
echo "Setup complete!"
echo ""
echo "To get started:"
echo "  1. cd ~/$REPO_NAME"
echo "  2. source .venv/bin/activate"
echo "  3. hf auth login   # Required for model checkpoint downloads"
echo "================================================================"
SETUP_EOF
Notes and Tips
- We recommend using GPUs with 80GB+ of VRAM.
- We recommend using instances with a 2 or more terabytes of storage. With less than 2 terabytes, you might run out of space.
- Don't forget to shutdown (i.e. delete) your instances when you're done.
- As of March 2026, most instances suitable for Transfer 2.5 and Predict 2.5 do not support the pause and resume (start/stop) feature.
- Note the Brev deployment time estimate when evaluating instance types (e.g. "Ready in 7minutes").
- Deployment can fail on occasion, and the driver version might not be what you expect when trying a new provider. For these reasons, set aside 3x your estimated ready time and you will be happy 😀
- Your favorite cloud provider might not always be available.
- You can change the compute for a Launchable. Here are some reasons you might want to do this:
- ☁️ The preferred cloud provider is not available.
- 💰 You want to save money with a different configuration.
- 🏎️ You want to try higher specs.